Categories
Disney @ Home Travel Tips Tutorials

Mickey Medicine Kit – How To

No one wants a blister, tummy ache, headache, the sneezies, or any other medical mishap to ruin a fun day at the parks.  But no one wants to bring a five pound emergency kit in their park bag either!  Finding a balance between being prepared and bringing too much is key on a Disney vacation.  Today I’ve got a little How-To for you that I hope will help get you through any little medical emergencies at the park so you can fix your family (or yourself) up and move on to more fun!

Made using Part of your World by Honeybee’s Creative Hive

This mini medicine kit is really mini, but it isn’t meant to hold supplies to last your entire vacation.  I pack mine with one of everything I may need while I’m at the parks or on the road.  Just enough to make you feel better so  you can finish out your day or until you can make it to your room, your resort store, your car, or the drugstore.  Back at the hotel I keep a large bag with more of all of these supplies.  At the end of the day, if I have used something from my mini kit, I can refill from the larger bag and be ready for an in-park emergency the next day.

Here is what I keep in mine:

  • 2 immodium tablets
  • 6 bandaids of different sizes
  • small packet of antibiotic ointment
  • 2 Bayer aspirin
  • 6 Tylenol
  • 2 allergy/sinus tablets
  • 2 Alka seltzer cold tablets
  • several small pieces of moleskin
  • 1 gas-ex tab
  • 1 small individual vial of eye drops
  • one cough drop

I know that seems like a lot to get into an altoid tin, but with careful layering it fits perfectly.  I’ve even added a few other items in there with no problem.

Supplies you will need:

  • empty altoid tin that has been washed out to remove any residue, and then dried thoroughly
  • small scissors
  • x-acto knife (can use sharp scissors too)
  • papers or printed digital items
  • red line tape
  • 16 inches of ribbon

1.BOTTOM – Create a new document in your digital scrap program that is 4.5inches wide by 3inches tall.  Or use paper cut to that size.  Clip whatever paper you choose (I like a fun pattern) to the rectangle and print.

2.BOTTOM – Cut out the rectangle of pattern paper and lay it evenly under your altoid tin.  Trace around the bottom of the tin as close as you can get to the edge of the tin.

3.BOTTOM – cut out the altoid tin shape using the pattern you made BUT SLIGHTLY SMALLER.  I use the edge of my scissors as a guide and cut about an 1/8 of an inch inside the line I drew.

4.BOTTOM – cut small pieces of your redline tape and place them around the edges of your paper, making sure there is tape on the corners.  Peel off redline tape and stick to bottom of tin.

5.TOP – in your 4.5×3 inch document, place a fun background and add some fun decorations.  Shadow and add any details you want.  DON’T PUT THE DECORATIONS AT THE EDGES! You may have noticed your pattern is actually larger than the size of your altoid tin.  This is so you can wrap the edges of the paper around the edge of the tin.  So when placing your decorative elements, don’t put them right on the edges of your scrapping area, move them more towards the center so they show on the lid.

6.TOP – Print your lid and cut it out, removing any white paper around it.  You just want the 4.5×3 block.  Lay your tin on top of the rectangle, getting it fairly centered inside.  Trace the lid of your tin onto the rectangle. Round out the corners of your rectangle to match the corners of the lid you traced.  AROUND THE CORNERS of the rectangle make small cuts about 1/4inch apart from the edge of the paper just to the traced line.

7. TOP – place redline tape around the INSIDE of the line you traced.

8.TOP – wrap redline tape around the sides of the top of the tin, paying attention to the corners.  Then wrap redline tape around the sides of the bottom of the tin, spaced evenly between the bottom edge of the lid and the bottom of the tin.

9.TOP – peel off the tape strips on the paper and stick the decorative paper to the top of your tin. You will have edges hanging over.  Peel off the tap strips on the sides of the lid.  Starting at the corners, stick down the flaps you created when you cut the edges of the papers.  Once all four corners are stuck down, stick down the sides of the tin.

10. TOP – Once the top and all edges have been stuck down, take an xacto or sharp small scissors and trim the edges, using the rolled edge of the tin top as a guide.

11. SIDE – peel off the redline tape from the bottom sides of your tin.  Find the center of your ribbon and place it at the center back of the tin.  Wrap the ribbon around the tin, placing it on the tape evenly between the top and bottom.  When you meet in the center front, tie a double knot in the ribbon and trim any excess ribbon.

You are done!  Here is a shot of the finished product again.

After our vacation, I use the decorated tin in my purse until it starts to fall apart.  But usually it can be rattling around in there for months and still look pretty good.   The Alice tin below is one I made for our September trip.  It’s been in my purse since then and it’s starting to look a little worn.  On this one I wrapped ribbon around the top and bottom edge, but I think I like wrapping the top edge with paper better.

This is a tin I did for our first trip in 2009, which was a mix of digital and hybrid.

I hope this post will help you be prepared for any emergency in the parks, or even an emergency out in the ‘real world’ and that seeing your cute tin decorated with something that reminds you of Disney will make you smile!

Categories
Disney @ Home Recipes

Delicious Disney..Sonoma Goat Cheese Ravioli

A trip to Disney makes so many fabulous memories.  A Disney adventure is filled by rides, song, sites, water, fireworks, and on and on, but for me…..fabulous food is an absolute must and can tie all these memories together.  There is nothing better than rebuilding a Disney recipe with great Disney music as an accompaniment- that Magic can continue even at home.  For me being an avid foodie and schooled chef, Disney dining holds a special place in my heart and always, and I do mean always, provides new inspiration and magical delicious surprises.  I love trying something new and then learning out how to make this new delicacy.  We all know that WDW has the most concentrated, world renowned food and restaurants in one place, save maybe New York City (and who needs that hassle).  Think about it, the world’s eatable goodies in Epcot, Victoria and Albert’s, Narcossee’s, Jiko, Brown Derby, Artist Pointe, and The California Grille. A special entrée can’t be beat but sometimes takes a lot of time, difficult ingredients, and the TLC of the chef, to make it perfect.  I’m not knocking em, I’m just saying……But if it’s a quick, mind-blowing special little trick that you can’t get enough of, can’t wait to eat and share with others, and you can’t wait till the next time you make it, a delectable appetizer is hard to beat.  There are one, two, or more of these awesome intros at every Disney dining experience, easy to pass up, BUT DON’T.  Here is one that will knock your socks off, simple, delicious, and perfect with a salad, nice bread, a glass of wine, and it may just turn into one of your favorites.  Hint: play Bella Notte from Lady and the Tramp while enjoying this wonderful dish.

Delicious Disney…Sonoma Goat Cheese Ravioli

California Grill * Disney’s Contemporary Resort

Chef de Cuisine: Brian Piasecki

This dish is perfect as a gluten free or vegetarian offering.

This recipe is fabulous because your Mouseketeers can help….

1 pound soft mild goat cheese, crumbled

5 1/2 ounces aged goat cheese, crumbled (I used Cypress Grove Midnight Moon- Product of Holland from Whole Foods)

1/2 cup seasoned bread crumbs (I used Progresso Itallian Style)

2 tablespoons store-bought basil pesto (I used home made pesto)

2 teaspoons extra-virgin olive oil

2 teaspoons Roasted Garlic Puree (recipe follows)

1/2 teaspoon salt, or to taste

1/8 teaspoon freshly ground pepper, or to taste

16 egg roll wrappers (I used Won Ton wrappers)

1 large egg and 1 tablespoon water for egg wash ( I only used water no egg)

Clear Tomato Broth, optional (recipe follows)

Serves 4 to 6

1.  In a large bowl, stir together the mild goat cheese, aged goat cheese, bread crumbs, pesto, olive oil, roasted garlic puree, salt, and pepper until well combined.

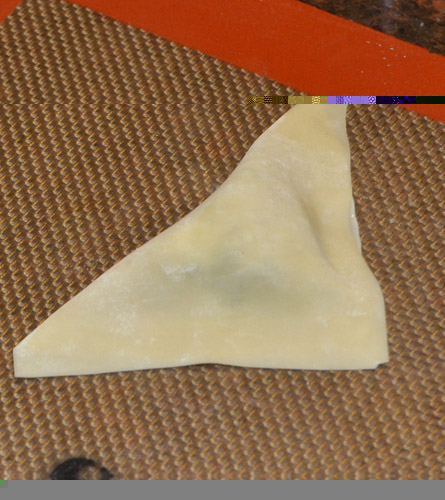
2.  On a work surface, lay out 8 egg roll wrappers and brush each with the egg wash.  With a sharp knife, mark each wrapper into 4 squares, taking care not to cut all of the way through.  Place about 1 tablespoon of the goat cheese mixture in the center of each square.  Cover with the 8 remaining egg roll wrappers and press the edges together.  (I did not want to take this much time so I used one wrapper per ravioli and folded it over in a triangle shape)

3.  With a knife, cut each double wrapper with filling into 4 squares, to yield 32 squares of filled ravioli.  press the edges together.  ( if you are not using the ravioli immediately, sprinkle them lightly with cornmeal and store refrigerated between layers of waxed paper.)

4.  When ready to serve, cook the ravioli in a large pot of boiling water for 1 to 2 minutes.  Drain completely.

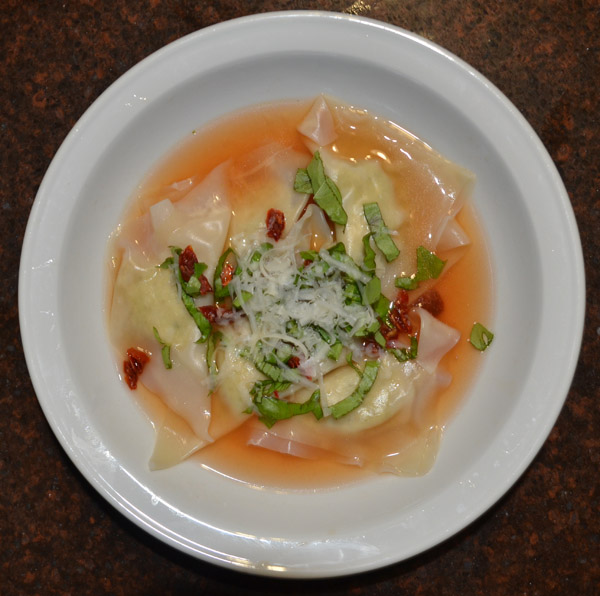
5.  Serve with clear tomato broth, if desired.  Top with a chiffonade of basil and sun dried tomatoes as well as a grating of fresh Parmasean cheese.

Cooks’ Notes:  If you don’t want to make the tomato broth, top the ravioli with chopped, seeded ripe tomatoes or a tomato juice “cocktail” also makes a suitable broth.

Clear Tomato Broth

15 whole vine-ripened tomatoes (I used tomatoes I had canned)

1 teaspoon salt

Makes 4 cups

1.  In a blender, in batches, coarsely chop the tomatoes with the salt. (I used an immersion blender or stick blender because they clean up so easily)

2.  Place the chopped tomatoes in a large sieve lined with a double layer of damp cheesecloth, set it over a bowl, and let the mixture drain in the refrigerator for 24 hours to collect the liquid.  Discard the tomato pulp and reserve the liquid.  (I have a hard time throwing away food so I reserved the pulp to use as tomato paste)

Roasted Garlic Puree

1 whole head garlic

1 tablespoon olive oil

Makes 2 tablespoons

1.  Preheat over to 400 degrees fahrenheit.

2.  Cut off the stem and top third of 1 whole garlic head.

3.  Place the garlic on a sheet of heavy-duty aluminum foil and drizzle with olive oil.  (I cooked alot of garlic because we love roasted garlic as you can see I just cook it in a bowl covered with foil)


4.  Wrap the garlic with foil, seal the edges tightly, and roast for 1 hour.

5.  Remove the package from the oven, open carefully, and let the garlic cool slightly.

6.  Scrape or squeeze the pulp from the garlic cloves.

What to drink:  Sauvignon Blanc is a classic match with goat cheese, and Mason Sauvignon Blanc from Napa Valley has the structure and acidity to nicely complement this dish.  (I used a wine from Cupcake Vineyards because that is what I had on hand)

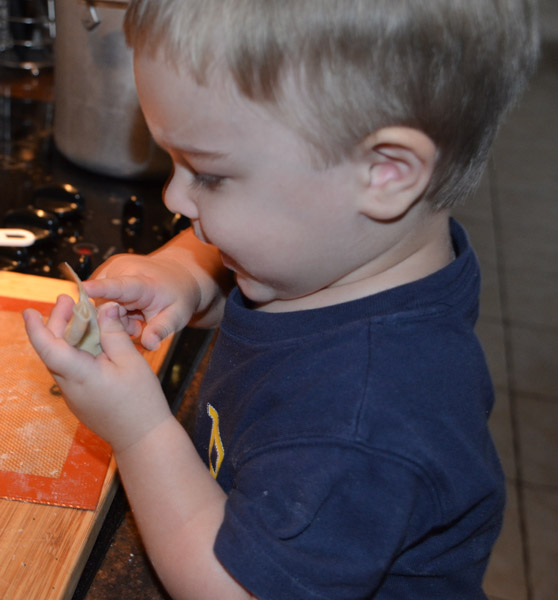
Well… as suggested, easy (our 2-year old master of the pasta made it), pretty quick, and absolutely worth the effort, this Sonoma Goat Cheese Pasta, paired with some lighter fare to balance the calories and some nostalgic Disney music is a transformation back to The Kingdom, not to mention, an edible treat that will thrill your family or guests.  Don’t stop at the Pasta, as Disney chefs and food imagineers, inspire with all their tasty gifts.  There are super special appetizers at every Disney restaurant and I’d advise spending some time making that first choice.  When you hit that enevitable diamond in the appetizer menu, don’t forget- you can take it home and relive that special, memorable occasion.  Don’t let the Magic stop at the parks….keep on eating and make it Magical!

One final note- just because this Sonoma Goat Cheese Pasta is filled with unbelievable cheese tastes, don’t believe for one minute that Mickey had any influence here in my first submission.  These are AWESOME on their own.

So many memorable vacation moments occur during a fabulous meal so hopefully you will be able to create your own special memories at home through Disney cuisine.


Happy cooking and bon appetit!